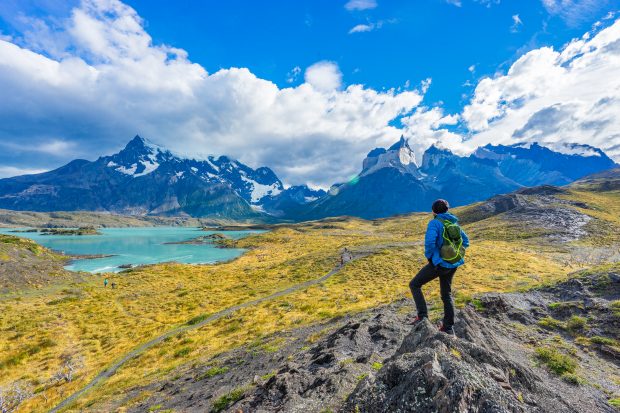
The Torres del Paine W Trek is one of the best multi-day treks to experience Chile’s most famous national park. In this hiking guide, I’ve compiled my personal experiences from a total of one month of hiking in the Torres del Paine National Park in Patagonia. (Last updated: 2025)
In this article, I’ll break down the standard route for the Torres del Paine W Trek (5 days) in detail. I’ll also cover a shorter (4-day) and a longer (6-day) itinerary. If you have little to no trekking experience, I recommend allowing extra time on the trail to fully enjoy the journey.
1. Preparation & Map
To get ready for this trek in Patagonia, check out my detailed guide to Torres del Paine National Park. There, you’ll find all the important travel info about logistics, how to book the campsites, and hotels. My recommendations regarding equipment for the W and the full circuit trek are listed in the Patagonia Packing List.
The usual starting and ending point for a trip to Torres del Paine National Park is Puerto Natales. Make sure to book your national park entrance ticket in advance online at Pases Parques Nacionales. For navigation on treks in Patagonia, I always use the AllTrails app, where you’ll also find the Torres del Paine W Trek with GPS navigation.
I would classify the W Trek in Torres del Paine National Park as a relatively moderate hike (compared to the more challenging Torres del Paine O Circuit). At the park entrance, every visitor gets a free map, but for better planning, consider getting a waterproof map beforehand. Given the unpredictable weather, it’s much more reliable than the paper version.
Please note: Due to the trek’s popularity, you need to book campsites in Torres del Paine well in advance. All information on how to book campsites are available in the linked guide above. You’ll also find alternative options where you don't need to book a campsite, such as day hikes from Puerto Natales.

The red route marks the Torres del Paine W Trek, the focus of this guide. The yellow line represents the gravel road in the southern sector of the park. The combination of the red & green routes forms the “O” Circuit.
2. Standard Route (5 Days)
The standard route of the Torres del Paine W Trek is relatively straightforward. It starts with a boat trip followed by a hike to Grey Glacier as the first highlight and ends with a sunrise at the famous towers.
Day 1: Puerto Natales – Refugio Grey (11 km)
Take the morning bus from Puerto Natales and get off at the Pudeto stop (the first stop after the park entrance). The stop is close to the dock, where you board the catamaran to Paine Grande. While waiting for departure, you can take a short walk to the nearby waterfall.
After arriving in Paine Grande, the trek begins. Follow the trail to Refugio Grey, which leads uphill along Lago Grey and offers some amazing viewpoints. This stretch takes about 3–4 hours. In the afternoon, you’ll reach the campsite, set up your tent, and have dinner.
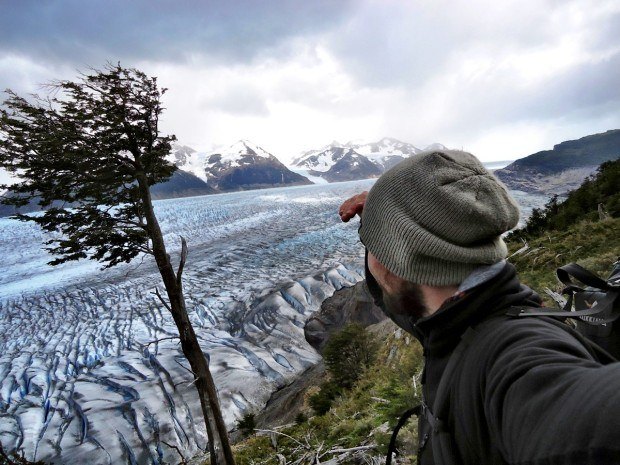
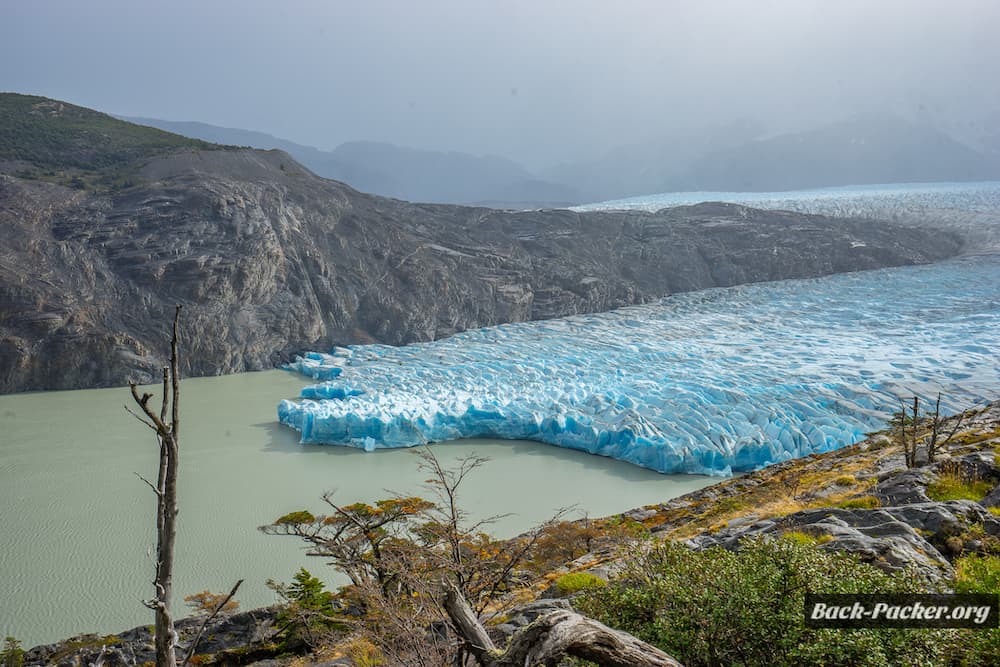
If you have time, head down to the lake. From here, you’ll have a spectacular view of Grey Glacier, and you might even see floating icebergs up close—an unforgettable experience!

Day 2: Grey – Glacier Viewpoint – Paine Grande (19 km)
Start early today. Leave your main gear at the camp and take only a small backpack with food and water. You can either hike to Ranger Station Paso (A) or head to Mirador Glaciar Grey (B).
(A) Paso Variant: After about 1–1.5 hours, you’ll reach an old campsite with a viewpoint offering incredible views of the Grey Glacier. This is a great spot for a break. The viewpoint is just after the first suspension bridge and is marked as a short red trail on AllTrails. Alternatively, there’s another viewpoint just before the first bridge.
Decide if you want to hike further. The higher you go, the better the views of the glacier and the vast Southern Patagonian Ice Field. However, be aware that extending the hike will add significant distance to your day. A good turnaround point is the first suspension bridge.
(B) Mirador Glaciar Grey Variant: This viewpoint is just a few minutes north of Refugio Grey, right by the lake. It’s an easier route but still offers fantastic glacier views.
Try to be back to Refugio Grey by noon (around 12 or 1 PM). Then, pack up and leave for the next part of the trek to Refugio and Camp Paine Grande around 1 or 2 PM. This section takes about 3–4 hours. Upon arrival, find a tent spot next to the small hill for some shelter from the strong winds.

Day 3: Valle Francés – Los Cuernos (28 km)
Today is a long and demanding day, so start early from Paine Grande (around 8 AM). The first section takes about two hours to reach the Ranger Station Italiano. Once there (around 10 AM), leave your large backpack and continue with food, water, and sunscreen towards Mirador Francés. It’s another 2.5 hours to the viewpoint.
At the top (around 12:30 PM), take a well-deserved break and enjoy the stunning views of the mountains and glaciers. Then, return to the Ranger Station Italiano, pick up your backpack (around 3–3:30 PM), and continue towards Refugio Los Cuernos. The trail follows the impressive Los Cuernos mountain range on your left. After another two hours of hiking, you’ll reach Refugio and Camp Los Cuernos by 5–5:30 PM.

Day 4: Los Cuernos – Campamento Chileno (15 km)
The second-to-last day is more relaxed. The route starts flat and easy but gets steeper towards the end. This part of the trek takes you from Los Cuernos to Campamento Chileno. Begin around 10 AM, following the trail along Lago Nordernskjöld, with incredible views of the lake and surrounding mountains.
After about 3.5 hours, you’ll reach a junction labeled “shortcut to Chileno” – follow this shortcut (left). Another two hours later, you’ll arrive at Refugio Chileno between 3:30 and 4 PM.
Set up your tent and get some rest because the final morning starts early to catch the sunrise at the Torres. Prepare your gear: pack a sleeping mat, sleeping bag, a warm jacket, breakfast, and a thermos with hot tea. Set your alarm 2–2.5 hours before sunrise.

Day 5: Chileno – Torres – Puerto Natales (14 km)
Start early to reach the Torres viewpoint for sunrise. The first section takes about an hour to reach the Ranger Station Torres. From there, the steep final ascent to the lagoon and the towers takes another hour.
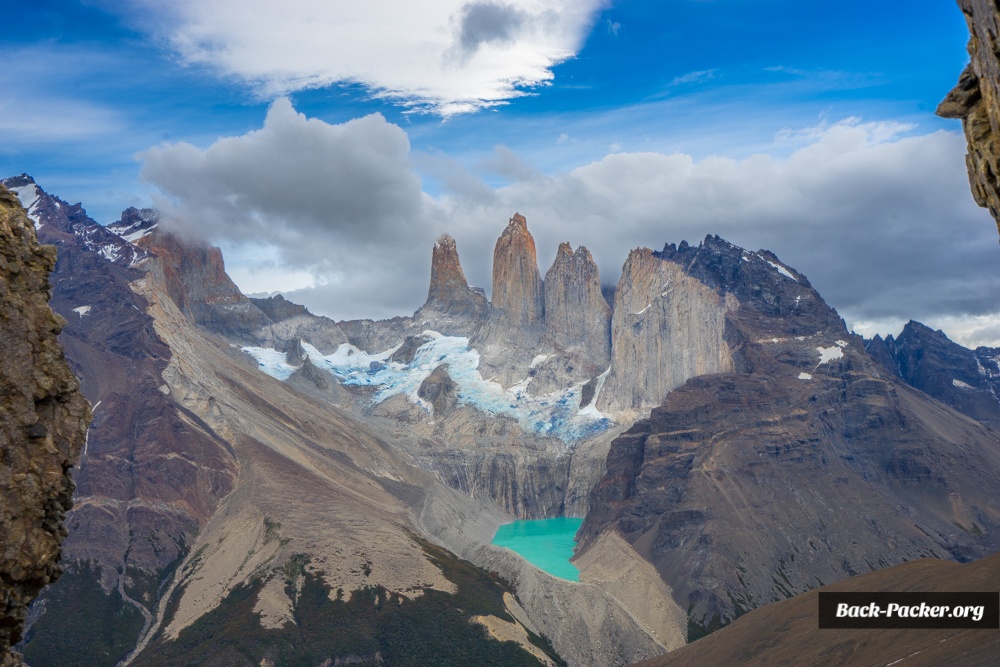
At the top, take in the breathtaking view and enjoy breakfast with the iconic backdrop of the Torres. If the weather isn’t ideal at first, don’t be discouraged – conditions change quickly. Dress warmly and be prepared for possible rain.
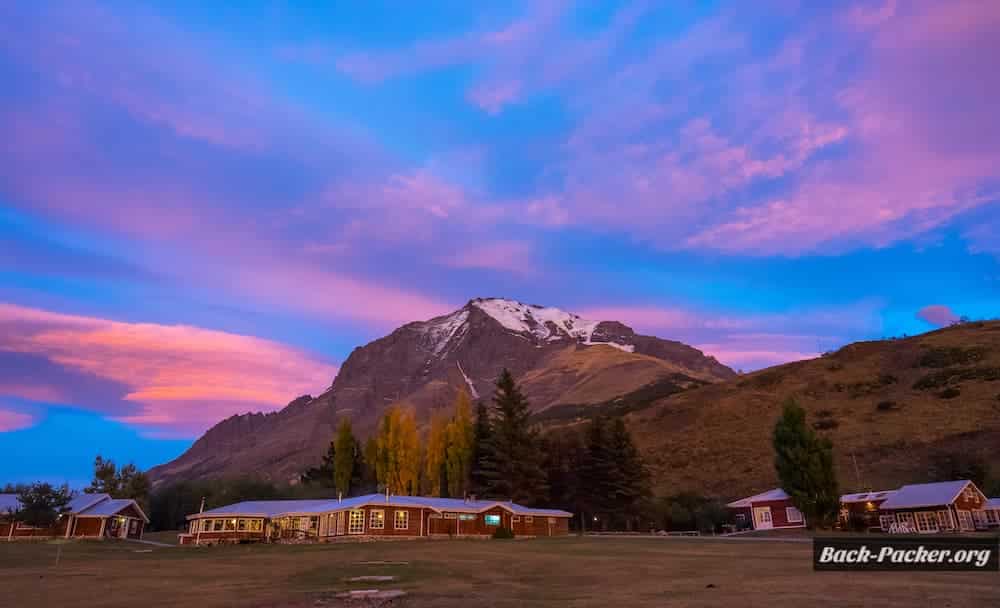
After breakfast, head back to Campamento Chileno, pack your things, and plan to leave the camp by 10 AM. The descent to Hotel Las Torres takes about two hours.
Once at the hotel, you have two options: walk to the park entrance (about one hour, 7.5 km along the road) or take the shuttle bus for a small fee. Regular buses back to Puerto Natales leave from the main entrance—departure times can be found in the linked guide.
Congratulations, you’ve completed the W Trek! You’ve covered nearly 90 km and earned a well-deserved meal. Back in Puerto Natales, you’ll find plenty of great restaurants where you can celebrate your trek.

3. Short Version (4 Days)
If you have less travel time are in good shape and have some hiking experience, you can complete the Torres del Paine W Trek in 4 days. This means combining days 1 and 2 of the standard route into a single, more intense day. Therefore you need to book one campsite less than in the standard itinerary.
Day 1: Puerto Natales – Refugio Grey – Paine Grande (22 km)
Take the morning bus from Puerto Natales and get off at Pudeto (the first stop after the park entrance). The stop is close to the dock, where you board the catamaran to Paine Grande. While waiting for departure, you can take a short walk to the nearby waterfall.
After arriving at Paine Grande, leave your main backpack at the campsite, keeping only a small daypack, and start the trek to Refugio Grey. The trail goes uphill along Lago Grey and offers fantastic viewpoints. The hike takes around 3–4 hours, and in the afternoon, you’ll reach the refugio.
Make sure to head to the Mirador Glaciar Grey, an essential side trip offering spectacular views of Grey Glacier. After a short stop (depending on your time), return to Paine Grande (about 3 hours). In the evening, set up your tent at the campsite.
Try to find a tent spot near the small hill to get some shelter from the strong winds.
Continue with Day 3 of the standard route for the rest of the trek.

4. Long Version (6 Days)
This version of the Torres del Paine W Trek takes a more relaxed approach, allowing extra time for viewpoints and photography. It extends the standard route by splitting the most demanding day and adjusting the campsites along the way. Follow the standard route until the end of day two, then continue with this itinerary:
Day 3: Paine Grande – Valle del Francés – Campamento Francés (20.5 km)
Take it easy and start from Camp Paine Grande around 9 AM. The first section takes you to the Ranger Station Italiano, where you can leave your large backpack again (arriving at about 11 AM). From here, hike up to Mirador Británico, a viewpoint offering incredible views of the surrounding mountains. The hike takes about 2.5 hours, meaning you’ll arrive just in time for a lunch break (around 1:30 PM).
After taking in the views, head back down to Ranger Station Italiano, pick up your backpack, and continue for another 30 minutes to reach Campamento Francés (2 km). Set up your tent for the night.

Day 4: Campamento Francés – Hotel Las Torres (15 km)
No need for an early start today: you can leave Campamento Francés around 10 AM.
The trail follows the shore of Lago Nordernskjöld, offering spectacular lake views along the way. After about five hours, you’ll reach a junction labeled “shortcut to Chileno.” Instead of taking this turn, continue straight on the main route towards Hotel Las Torres.
By around 4 PM, you’ll arrive at Hotel Las Torres, where you can either stay at the hotel or camp at the adjacent Campamento Central.
Day 5: Hotel Las Torres – Campamento Chileno (5 km or optional 14 km)
This is the most relaxed day of the trek, as you only need to hike two hours uphill to Campamento Chileno. Take your time in the morning and aim to reach the camp around midday.
Now, you have two options: You can either hike up to the Torres viewpoint in the afternoon or wait until the final morning to experience the sunrise.
Continue with Day 5 of the standard itinerary for the final day of the trek.
5. My Experience
During my time in Torres del Paine National Park, I completed the W Trek, the full Circuit, and several additional day hikes. I first hiked the O Circuit, including the W Trek, in 2013 and repeated it in 2016. Most recently, in 2023, I returned for more treks around Puerto Natales and within the park. In total, I’ve spent about four weeks in Torres del Paine.
All the estimated hiking times in this guide are based on my personal travel experience in Patagonia. I tend to hike a little faster than average but took plenty of breaks for filming and photography. The result of this trip is my award-winning Patagonia documentary, where you get to see how we tackle the circuit. Additionally we also do some day hikes with a local guide:
6. Tour Options
If you have difficulties booking campsites and organizing this hike by yourself you you should look into a tour. Booking a fully guided tour allows you to leave all the logistics, rental gear, transport, meals, and complex camp reservations to the local experts.
While this option is more expensive, it ensures a stress-free experience with porters and experienced guides who will accompany you on the trail. Among all the guided treks, the W Trek option is a fantastic choice for those looking to experience the highlights of the park. G Adventures, a company I have traveled with multiple times and highly recommend, offers several great tour options covering this trek.
- W-Trek with G Adventures – A 6-day tour including meals, guide, camps, tents/hotel, transport, and porters. A great way to experience the best sectors of the park without the hassle of organizing everything yourself.
- Patagonia Hiking XL – A 14-day adventure that covers Patagonia’s top highlights, including the Torres del Paine W Trek, El Chaltén (Fitz Roy, Cerro Torre), and El Calafate (Perito Moreno Glacier). This tour offers a well-rounded travel experience, combining trekking with cultural insights.
- Patagonia & Tierra del Fuego – A 14-day tour that explores multiple regions, including the Torres del Paine W Trek, El Chaltén, El Calafate, and Ushuaia. This option is great for those wanting to see both Patagonia’s famous trails and its remote southern sectors.
Have you hiked the Torres del Paine W Trek?
How was your travel experience in Patagonia? Did you hike the circuit or the W? Which highlights would you recommend doing during a trip in the area? If you have additional tips for this Torres del Paine hiking guide, feel free to reach out to me on Instagram!
Note: This hiking guide for Torres del Paine National Park in Chile contains affiliate links. These are exclusively providers I trust and services I personally use when I travel. I can therefore confidently recommend them. Using these links allows you to save money while supporting this blog. There are no extra costs for you. As always, all opinions, recommendations, and sarcastic remarks are my own.